> For the complete documentation index, see [llms.txt](https://docs.reveald.com/technical-documentation/llms.txt). Markdown versions of documentation pages are available by appending `.md` to page URLs; this page is available as [Markdown](https://docs.reveald.com/technical-documentation/admin-guides/epiphany-intelligence-platform-administrator-guide/administration/user-management.md).
# User Management
### Viewing Epiphany Users
All Epiphany users are shown on the User Administration pane. They are listed in alphabetical order by email address. The display shows if the user is enabled or disabled, whether they have two-factor authentication enabled or disabled, the groups they are assigned to, their roles, and their rights.
1. In the left navigation under Administration, expand **User Management** and then select **User Administration**. This displays all the users currently enrolled in Epiphany.
user cards in user management
{% hint style="success" %}
Colored circles to the left of a user's email and name show the person's initials. The colors are randomized for visual distinction and don't convey any information.
{% endhint %}
### Setting up a New User
1. At the top of the User Management pane, select **Create New User**.
2. In the Create User dialog box, enter the user’s **Email**, **First** **Name,** and **Last Name**. These are required fields. The user's first and last name will be used to create their avatar.
creating a user
3. Optionally, you can select a **Group** and **Role** for the user. Groups and roles vary for each organization. Users inherit roles from their group, and rights from their role.
4. Example roles are shown below:
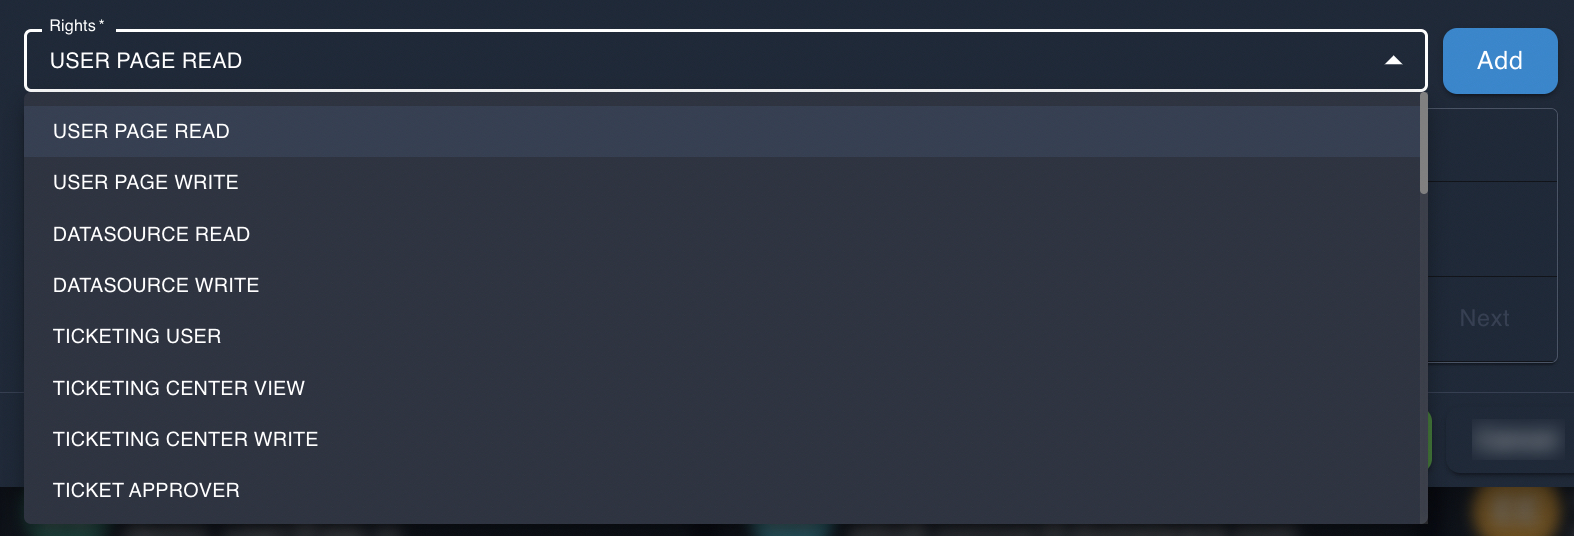
5. Optionally assign rights to each user. This controls what each user has access to and what types of edits they can make. The rights available vary for each organization. Each user can have multiple rights assigned. To assign a right, expand the **Rights** drop-down, select a right, and then click **Add**. Just repeat this step to add additional rights. Example rights are shown below:
{% hint style="info" %}
It's best practice that users inherit rights through their group/role membership(s), not through direct assignment. Consider creating (or using) Group memberships and Roles to define rights rather than directly assigning them.
{% endhint %}
### Enabling or Disabling a User, Enabling Two-Factor Authentication, and Resetting a Password
Once a user is set up, you can:
* Enable and disable the user. This is useful when people leave your organization, only need temporary access, or are on leave and you want to block access.
* Require or disable two-factor authentication.
* Reset a password.
1. On the User Management pane, expand the **Select Action** drop-down below a user's name. \
\

2. Select **Disable User**, **Enable 2FA**, or **Reset Password** and then follow the instructions.
### Editing an Existing User
1. On the User Management pane, expand the **Select Action** drop-down below a user's name. \
\

2. Select **Edit User**. The Update User dialog box displays.
3. Make any edits to the user and then select **Update**.